AeroPress Brew Guide
The Aerobie Aeropress has taken the coffee world by storm, its advanced coffee making experience has allowed caffeine lovers and coffee bean connoisseurs to achieve the perfect brew anywhere from the kitchen to the campground.
This dynamic device has evolved from a seamless coffee maker to an element of a culture and a lifestyle, with baristas from all over the world joining together for the annual World Aeropress Championship, with one goal in mind - finding the perfect Aeropress recipe. One of the most convenient features of the Aerobie Aeropress Coffee Maker is its undeniable flexibility. The device is easy to use, even easier to clean, and ridiculously portable.
Users of the Aeropress have joined together to form the Mile High Aeropress Club, a group of extreme coffee and travel enthusiast who banded together in 2008 to share their love for the art of portable coffee making.
The name “Aerobie” may be familiar to you. Aerobie is also known for breaking a Guinness World Record. The company mastered the technology of aerodynamics by creating the highest flying Super Disc. Aerobie used the same aerodynamic technology when creating the Aeropress.
What Is The Best Way To Use Aeropress?
How Do You Make A Good Cup Of Coffee With An Aeropress?
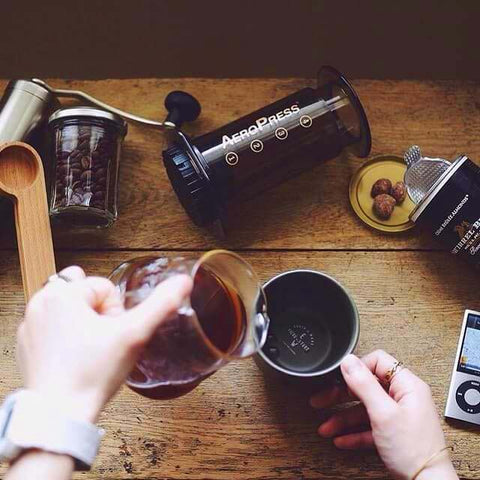
Things You'll Need:
- AeroPress Coffee Maker
- AeroPress Paper Filter or Aeropress Disk Filter
- Two to 3 Tablespoons (15 grams) of Craft Coffee Beans
- 240ml water, and additional for rinsing
- Pour Over Coffee Kettle
- Stirring utensil
- Timer (often built in to scales)
- Mug
- Burr grinder (recommended)
- Coffee Scales (recommended)
How to Make the Best Aeropress Coffee
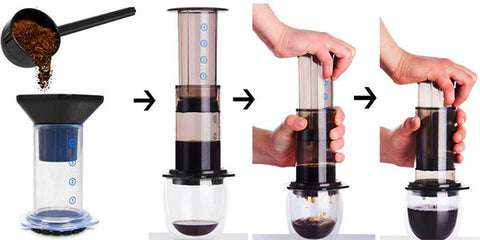
The perfect brewed coffee should be delicious, light, and easy to make every day. Achieving the perfect Aeropress brew is a simple step by step process. Once you get started you’ll notice how seamless the Aeropress process truly is.

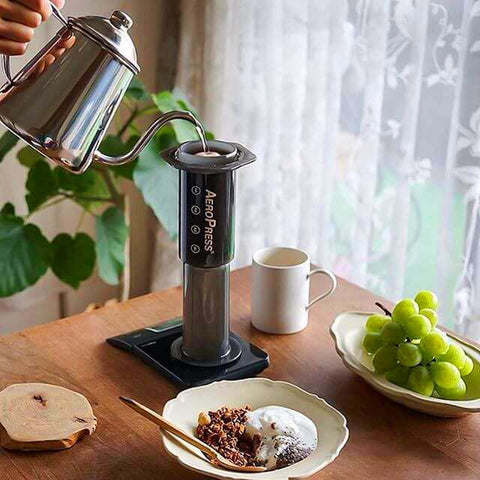
1. Bring your kettle to a boil of approximately (~94°C). Allow the boiled water to sit for about 60 seconds for optimal results.
2. Place your Aeropress filter into the lid. Rinse the filter with hot water so that the paper is sealed to the lid. Be sure to empty the rinsing water before moving ahead.
3. Measure your whole bean coffee and grind it down to a smooth texture, a bit below medium. Measure your batch based on your preferences, but usually starting between 13g-18g of coffee should be enough for a serving.
 4. Piece together your Aeropress. Connect the rubber stopper and gently shake in your ground coffee. Be sure to secure the rubber stopper to avoid slippage.
5. Turn on the timer and seap in half of the water over the coffee grounds. Let the hot water sit with the grounds for approximately 45 seconds. Allow the coffee grounds to soak and bubble. Now you should start getting the delicious aroma of brewing coffee.
6. Allow your scale to rise and pack the AeroPress with the coffee.
7. Gently stir the mixture for 5-10 seconds.
8. Attach the cap and the filter to the AeroPress device.
9. At 1 minute and 30 seconds, get your mug ready, flip the AeroPress over and place it directly on top of your mug. You may want to practice flipping a few times to assure that you don’t make a mess. Once you’ve flipped, it’s time to pump! Push the plunger down (about 20 times) in a pumping motion until you hear a hissing sound.
10. Unlike most processes, the clean up is the easiest part of using the Aeropress. Take your AeroPress apart by removing the cap and the disk. Use the plunger to clear out the remaining grounds, push the plunger all the way in and proceed to rinse off the disk with warm water. Be sure to clean the grounds thoroughly to maintain a fresh batch for future use of your AeroPress. Use a soft bristled brush to guarantee cleanliness. Rinse out the remaining pieces of your Aeropress and wipe it with a soft dry towel or napkin.
Which Grind Setting is Best for Aeropress
Wondering which grind setting is best for your Aeropress? All coffee connoisseurs understand the importance of selecting the perfect grind setting for your coffee. The best way to figure out your ideal setting is to experiment. The AeroPress is manufactured to grind at a happy medium between Fine (espresso) and coarse (French Press). The more you practice and adjust the settings, the closer you’ll get to achieving your personal best batch. Play with your hand grinder and adjust the settings as needed.
 Aeropress Recipe
Now that you’ve learned some background on the Aeropress and you know how to use it, the next step is to try out some of our best Aeropress recipes. The World AeroPress Championship Competition has lead the way for some of the most infamous brews of all time. Winners of the competition have presented various measurements, temperatures, grind levels, and contact size all rendering results with maximum flavor and smoothness.
- PAULINA MICZKA of ENGLAND used 35g of coffee to create a delicious hot concentrated brew.
- SHUICHI SASAKI, of JAPAN used soft mineral water in her brew for a smooth and refreshing outcome.
 Use 16.5g of coffee
 - NICK HATCH, of CANADA used a Baratza Virtuoso grinder and minimal stirs for a delicious chilled brew.
How to Brew Coffee in an AeroPress from Stumptown Coffee Roasters on Vimeo.
 Same Day Dispatch
 Aeropress Recipe