 Same Day Dispatch
The Master Coffee & Espresso Grinding Guide For Cafes
As a coffee professional, you’re not interested in settling for ‘meh’ coffee. You want to give your customers coffee that’s rich, vibrant, and uber-satisfying. And to get there, you can’t approach grinding your coffee casually.
Grinding whole bean coffee is a non-negotiable for any cafe or restaurant looking to make a splash in the specialty coffee market. But having a great grinder isn’t enough, you need to know how to use it to elevate your coffee quality continually.
In this article, we’ll teach you everything you need to know to ensure your cafe is grinding coffee as efficiently and effectively as possible.
- ● Why grinding fresh is a non-negotiable for stellar coffee
- ● How you can use your grinder to brew better and better coffee every day
- ● How to pick the perfect grinder for your cafe or restaurant
- ● The differences between grinding for black coffee and espresso
We’re going deeper than your average coffee blog, but by the end, you’ll know more than your average pro barista—and your customers will thank you for it.
Let’s start with a refresher on the basics.
Your Coffee Is Going Stale
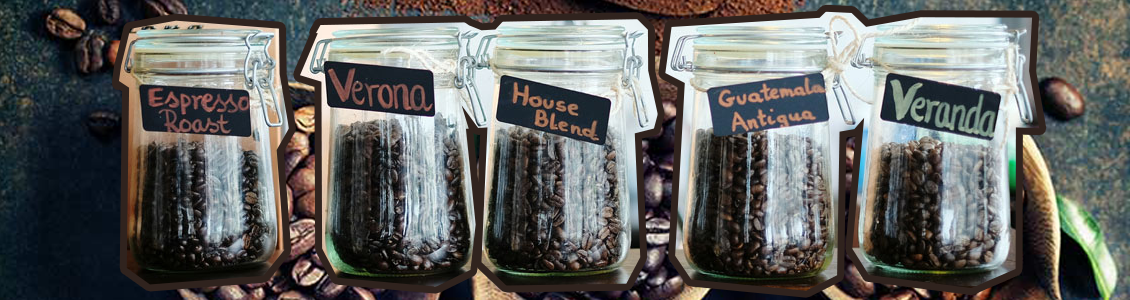
Like all agricultural products, coffee beans have a limited shelf life. Unroasted, they can remain at peak freshness for a year or longer. Once they’re roasted, however, that window of freshness is decreased dramatically.
Once roasted, whole coffee beans only have 2-3 weeks of peak freshness. Beyond that time-frame and the quality begins to drop, the unique characteristics start to fade away, and your customers enjoy your daily brew less and less.
You and your staff need to be keenly aware of your coffee’s age. Don’t over-order beans that will last you more than two weeks. Don’t use old beans you find behind the table from months ago. Beans decay over time, and if you forget that, your quality will suffer.
What You Have To Lose
An array of chemical and physical changes take place once the coffee has been roasted. One of the big ones is the rapid expulsion of CO2. As the carbon dioxide is expelled from the beans, a small gap is created where that gas once was.
And what fills up that space once the CO2 is gone? Oxygen.
We love oxygen, but it’s not our friend when it comes to freshness. Sometimes called ‘the great decayer’, oxygen reacts with just about everything. It causes apples to brown, iron to rust, copper to turn green, and coffee to go stale. This process is called oxidation.
Once oxidation has its way, your coffee’s acids will turn bitter, the sugars will fall apart, the aromatic oils will evaporate, and all those clear, delicious flavors will melt into an indistinguishable, muddy flavor.
Simply put, oxygen is the enemy of freshness, and thus, something you need to be hyper-aware of when you’re storing and grinding your coffee. Check out our post about why freshly ground coffee is worth the effort here.
Store Beans Properly To Maximize Freshness
If you carefully store your coffee beans, you can maximize their peak freshness time. This not only gives you better coffee, but it also provides some flexibility when it comes to ordering beans from your roaster.
Here are a few basic principles to follow:
- ● No Light — The sun’s UV rays can cause your beans to decay more rapidly than normal, but that’s not the only light you need to avoid. In fact, every light (even artificial lighting) can initiate photodegradation, a type of decay in food. Use opaque bags or coffee containers to store your beans.
- ● No Heat — There’s a reason that leftovers are stored in the fridge: cold environments cause decay to happen more slowly. The opposite is also true: heat speeds up decay. Don’t store your coffee in an area where they’ll face a lot of heat, like near a windowsill or by the oven.
- ● No Oxygen — This is perhaps the direct principle of all. If you leave your beans exposed to a constant supply of new oxygen, they’ll go stale in just a week or two, instead of being at peak freshness for as long as three weeks.
If your roaster sends you coffee beans in opaque, sealed bags with one-way CO2 valves, you can actually count on your coffee being usable for longer than 2-3 weeks. If you wait a full four weeks to open a bag, those beans may not be at their peak, but they won’t yet be stale since they were relatively blocked from these things.
However, as soon as you open that four-week-old bag of beans, they will begin decaying—and fast. Use them ASAP. We don’t suggest using beans in your cafe that are over four weeks old.
Your Coffee Grinder Is Your Cafe’s Greatest Tool
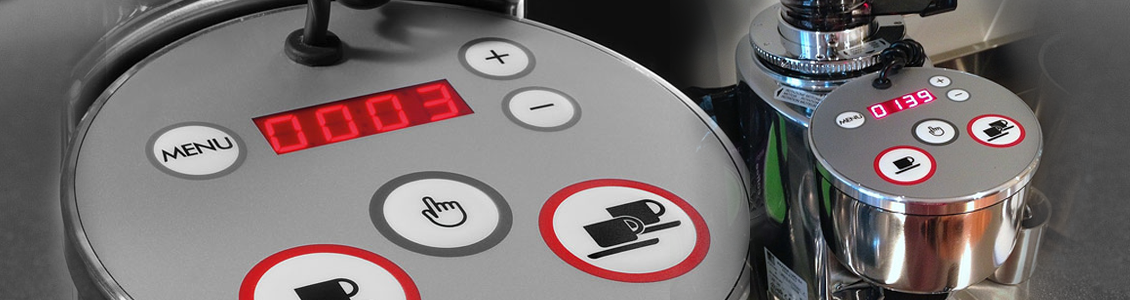
The usual temptation is to focus on a powerful espresso machine, which is fine—as long as you pair it with a powerful grinder. But here’s the truth: your grinder is the most important piece of coffee equipment your cafe has.
Without pro-level coffee grinders, you won’t be able to rely on it long-term, you won’t be able to make changes to your grind setting to improve your coffee, you’ll be limited in terms of the types of brewers you can use, and your coffee will simply not be as tasty as it could be.
Whether you run a large cafe or a simple espresso bar, a powerful grinder opens up a whole new world of coffee. You don’t just want to stick to a low-end consumer grinder, you want to buy a grinder or two that’ll enable you to thrive.
How To “Dial In” Your Coffee And Espresso Grind
The entire reason you buy a commercial coffee grinder in the first place is twofold: (1) to grind coffee fresh and maximize flavor and (2) to be able to refine your grind settings to improve flavor over time.
We’ve already covered the first reason quite a bit, so let’s move onto the second: “dialing in” your coffee and espresso.
The Basics Of Grind Setting Adjustments
When your coffee doesn’t taste quite right, a small adjustment may be able to bring back flavor richness or balance. It’s all about controlling extraction. Essentially, smaller coffee grounds extract faster than bigger ones.
- ● Over-extraction occurs when you pull too much out from the grounds. The crisp acids, sugars, and aromatic notes become overshadowed by all the extra bitter compounds that were pulled from the beans at the end. The coffee’s weak and dull.
- ● under-extraction takes place when you don’t pull enough from the grounds. Those bright acids have nothing to balance them out, so they taste and feel overpowering. The coffee’s too concentrated, sour, and has a very harsh tang.
If you over-extract your coffee, the goal for the next brew is to extract less to bring back balance. You could do this by using a coarser grind setting. Not only will the water extract a little less from the grounds, but—if you’re using a drip or pour over brewer—the coarser grounds will let the water drain slightly more quickly.
If you under-extract your coffee, the goal for the next brew is to extract more. You can use a finer grind setting to cause the grounds to extract a little faster. And if it’s with drip or pour over coffee, the water will drain more slowly, extracting a little more that way as well.
Let’s see how these ideas play out more practically.
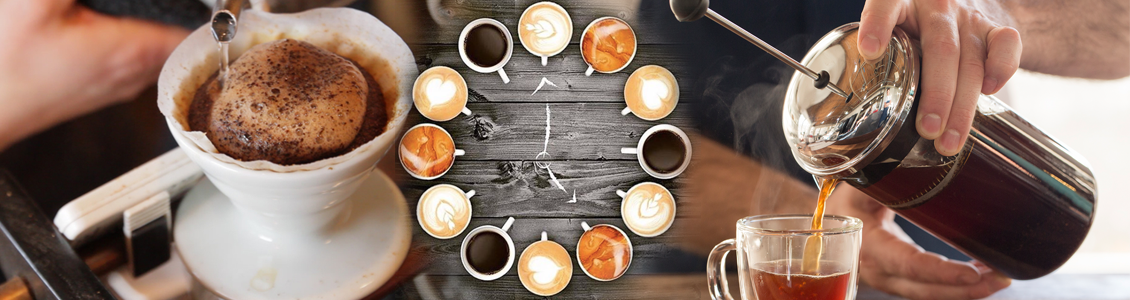
Dialing In Your Brew Bar
Whether you’re serving french press, Chemex, or any other manual coffee method, the same rules apply: smaller grounds extract quickly, larger grounds extract more slowly. Let’s see a couple examples of how you can diagnose and dial in a coffee.
A French Press Example
You brew coffee with a french press and notice it’s weak and dull. You realize that the flavorless coffee is over-extracted (the bitter notes have killed all the flavor). The next time you make a french press, you grind at 1-2 settings coarser, but leave the brewing time the same.
Since the water extracts things from the grounds at a slower pace, you successfully extracted less. You taste the coffee and notice it has flavor, the acids are balanced and crisp, and there’s a gentle sweetness.
A Pour Over Example
You brew coffee with a pour over cone and realize it’s really acidic and sour. You think back to this blog and decide the coffee is under-extracted. The next time you make pour-over coffee, you grind the beans 1-2 settings finer but leave everything else the same.
Since the water was able to extract things from the grounds slightly faster, and since the smaller grounds slowed down the draining speed, you successfully extracted more. You take a sip and enjoy a sweet, crisp, and well-rounded brew.
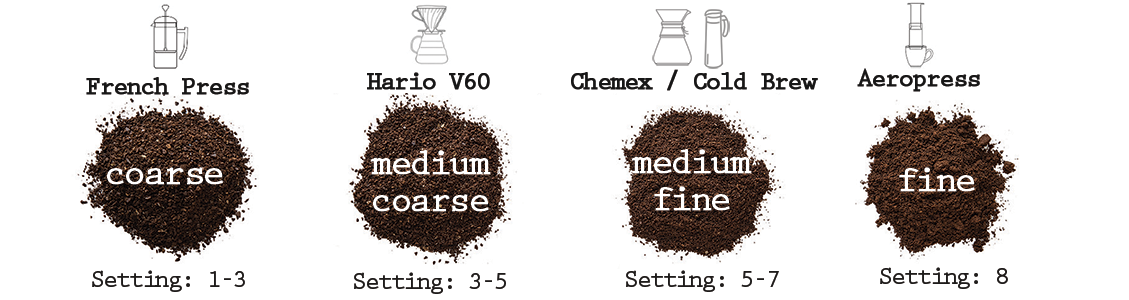
A Quick-Start Guide For Brew Bar Methods
French Press — Coarse. The mesh filter and plunger requires coarse grounds and is prone to creating a lot of resistance when finer grounds get stuck in the filter. Finer grounds also pass through the filter and make your final brew gritty.
Hario V60 — Medium-fine. The cone’s large draining hole encourages a fast draining time if your grind setting isn’t fine enough. A medium-fine grind tends to drain at the right speed for a balanced brew.
Chemex — Medium-coarse. The patented Chemex filters cling to the cone’s walls, slowing down the draining speed. The filters themselves are also fairly thick, which slows down draining some more. A medium-coarse grind typically balances out the slightly extended brew time.
Cold Brew Coffee — Medium-coarse. Since you’re likely brewing for 12+ hours with cold brew coffee, a medium-coarse to coarse grind is essential for not over-extracting.
Aeropress — Medium-fine to coarse. The Aeropress is a very adaptable device. Use a medium-fine grind and a short brewing time or consider a coarse grind and a longer steep. You can go either direction, just make sure the grind and steep time are balanced out.
Dialing In Your Espresso
Espresso is a bit of a different beast when it comes to dialing in. You’re typically not working with only twenty or so settings like with a brew bar grinder—you can be working with dozens or even hundreds.
Here’s why: dialing in espresso requires grind adjustments that are so small you can’t see or feel them happening.
But despite not being able to actually see the difference, you can tell once you pull the shot. And you can definitely tell once you taste it. Since espresso is such a concentrated form of coffee, small grind changes can have massive impact.
And not only that, but tasting and diagnosing espresso is harder because it’s far more intense. You really have to train your palate to understand espresso flavor because it can be so different.
An Easy Way To Train Your Palate
First, pull a shot for fifty seconds. Generally, espresso shots need 25-35 seconds to become balanced, so you can know for certain that this one will be far over-extracted. Taste how it’s weak, dull, and bitter.
Next, pull a shot for about fifteen seconds, then cut it off. This shot will be under-extracted. Taste how it’s acidic, sour, and way too concentrated.
This exercise gives you a clear understanding of the differences between over and under-extraction in the context of espresso, but it’s going to be harder when the differences aren’t as extreme. Let’s see a practical example of how you may dial in mid-shift.
An Espresso Example
You use 20g of coffee to produce a 40g shot in 27 seconds. You taste the shot and notice that is has a good body, but it’s still overly sour and acidic. The shot is under-extracted.
You adjust your grind setting to be slightly finer and begin to pull another shot. You still use 20g of coffee and produce a 40g yield, but this time it takes 29 seconds. You taste the shot and find that it still has a crisp acidity, but that it’s balanced out by a refreshing sweetness and pleasant low notes. Nice!
It’s more difficult and frustrating than dialing in brew bar coffee, but this skill is essential for your staff if you want your cafe to be known for its quality espresso.
How To Pick The Perfect Coffee Grinder
Let’s take a quick look at some of the buying decisions you face when it comes to consumer-level coffee grinders.
Doser VS Doserless
Many coffee grinders have a small chamber that ground coffee is dispensed into. This chamber features a small lever that you can use to dose the right amount of coffee into your portafilter. This mechanism is called a “doser”.
Dosers can be nice because they allow you to grind a lot of coffee at once, then quickly dose it out manually when espresso is ordered. However, this process tends to take a little extra time.
Other espresso grinders dispense ground coffee directly into the portafilter and use a digital timer or scale to dose the coffee. Since there’s no doser that’s a mid-way point between the grinder and the portafilter, we call these “doserless” grinders.
Doserless grinders are nice because they eliminate a step in the grinding process. While you do still have to change the grinding time every now and then to ensure you’re not over or underdosing, it tends to be pretty quick. And then you don’t have grounds going stale between shots.
Stepped VS Stepless
Stepped grinders have a defined number of settings. Sometimes it’s 40 settings, other times it’s 10 settings with 4 micro-settings each. Either way, you have a specific number of settings, and that can feel limiting. What do you do if the perfect setting is between two numbers? Well, there’s really nothing you can do.
Stepless grinders have continuous gears and no defined settings. You can turn the grind collar a small amount, a large amount, or anywhere in between. You literally have an unlimited number of settings. While pro baristas love this flexibility, it can be a bit overwhelming for new baristas.
If you really want to have an all-star staff and A+ espresso, go with a stepless coffee grinder for the espresso setup. However, stepped grinders are just fine for brewing regular black coffee.
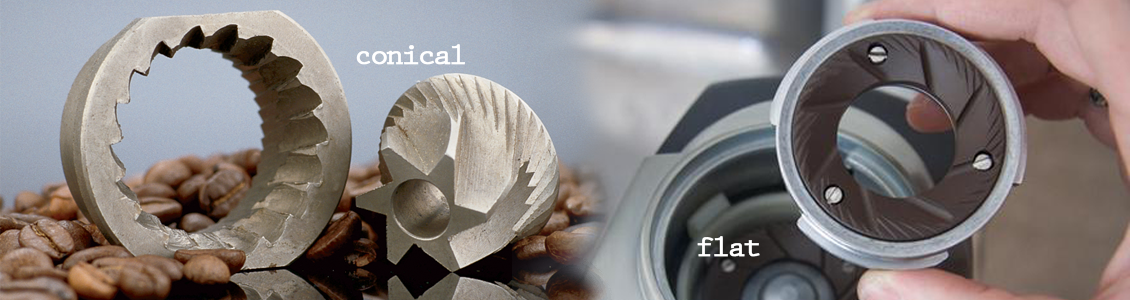
Flat VS Conical Burrs
Flat burrs are the most common burr type for espresso because they create what is called a unimodal grind. Essentially, if you were to sort every single coffee ground, you would notice that there’s only one big group with a few outliers. That level of precision is needed for stellar coffee, but these burrs tend to be more expensive.
Conical burrs are more common for brew bar grinders because they’re less expensive and still very accurate. However, they do create a bimodal grind, which means that if you sorted every ground, you would see two distinct groups of grounds that are pretty close to each other in size, rather than just one.
We suggest a flat burr automatic grinder for espresso and a conical burr grinder for everything else.
Conclusion
Whether you’re looking to up-level your cafe’s quality or are about to launch a new cafe, you’re now caught up on just about everything there is to know about grinding coffee at a pro level.
Now, it’s time to get yourself a grinder or two and start practicing dialing in. It will take some time to built that skill, but you’ll be glad you took the time when your customers come back over and over again for your delicious coffee and espresso.
Take a look at the most popular commercial coffee grinders and best of luck with your new venture.